Hey crafty friends, Gina here with my first Design Team project for October. Check out how easy it is to make this simple decor piece to show off one of your favorite photos.
Supplies you will need:
1. Large Unfinished Wood Tag (4.375” X 10”)
3. Foam brush applicator
4. “I’d Rather be Crafting” collection kit by Echo Park
6. Mod Podge
7. Bone folder
8. Crop-A-Dile (or other hold puncher)
9. Scissors
12. Foam adhesive
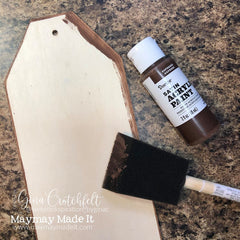
2. Paint edges of wood tag with brown paint.

3. Using a pencil, trace the shape of the tag on the patterned side of 12X12 paper “Point and Shoot” from the “I’d Rather be Crafting” collection kit by Echo Park. (Reverse side is brown wood grain.) Make a pencil mark where the hole is in the tag.

4. Cut tag shape from the patterned paper, trimming slightly smaller than pencil marks so the paper doesn’t hang over the edges of the tag. Punch hole where mark is.
5. Ink edges of cut paper tag.

6. Apply a thin layer of Modge Podge to the wood tag and press patterned paper tag down. Use a bone folder to smooth, starting from the center and smoothing out towards the edges. Wipe away any Modge Podge that gets pushed out of edges.

7. Cut hole through paper by lining up a Crop-A-Dile on the back side of the tag. Turn over and use Walnut Stain Distress Ink to ink the edge of the hole.

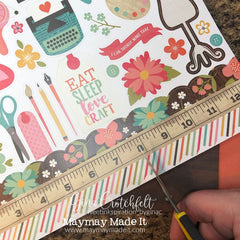
8. Trim a 4.375” X 1.25” strip of paper from the “Fresh Cut Flowers” patterned paper sheet. Ink edges and adhere to bottom of wood frame.

9. Cut off 4.375” of the striped border sticker from the bottom of the Element Stickers. Ink edges before adhering across the bottom of the tag on top of the strip of “Fresh Cut Flowers” patterned paper.

10. Remove the “beautiful” sticker from the Element Stickers sheet and use a powder tool or embossing buddy to dull tackiness on the back. Ink edges. Use pop dots or other adhesive foam to adhere it across the top of the tag, approximately .75” below the hole.

11. Cut a 4” X 6” photo mat from the yellow patterned paper on the back side of “4 X 4 Journaling Cards.” Ink edges and adhere to tag approximately .5” below the “beautiful” sticker so that it overlaps the “Fresh Cut Flowers” orange paper on the bottom about .25".

12. Remove flower stickers from the “Element Stickers” sheet and use a powder tool to dull tackiness on the back. Arrange at corners of photo mat as shown in Pic 10, using foam adhesive. Be sure to place foam adhesive so that a photo may be slid under the flowers, onto the photo mat.
13. Put twine back through hole and knot. Using 10” piece of satin ribbon, make a bow and adhere just below the hole.


